Please feel free to comment and like our posts..
Thanks
Romessa and Huda !
Friday, 13 September 2013
Thursday, 12 September 2013
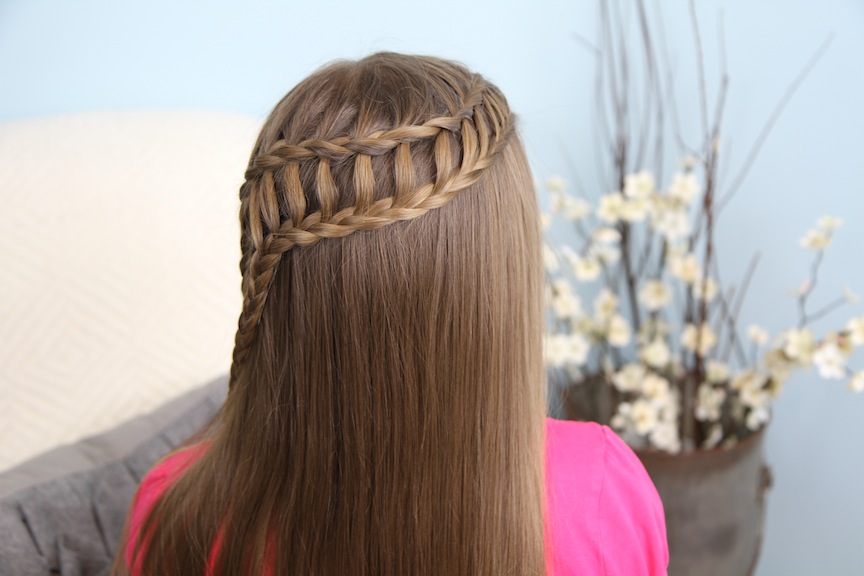
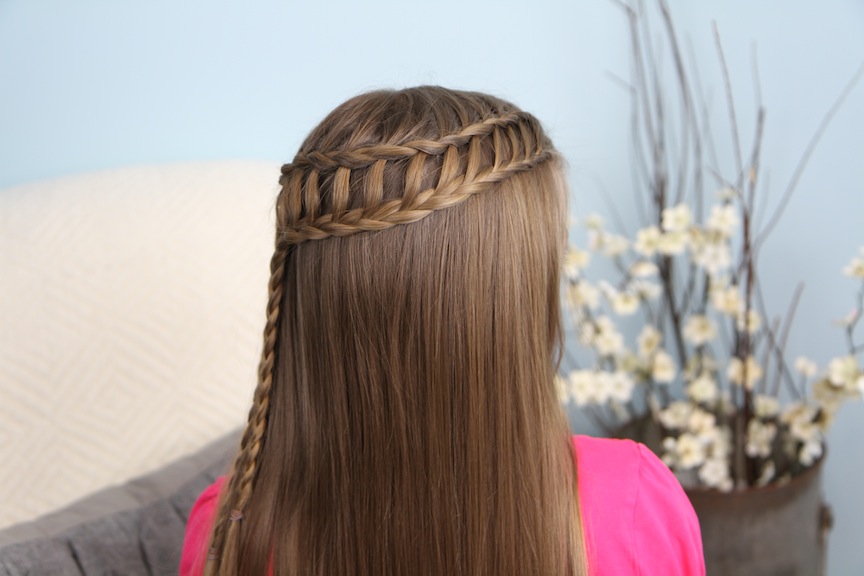
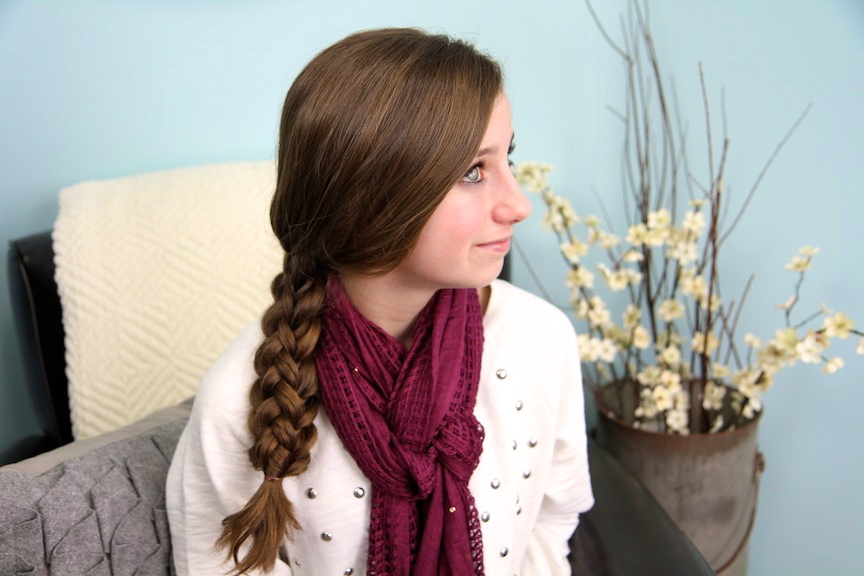
Feather Waterfall & Ladder Braid Combo | 2-in-1 Hairstyles
Feather Waterfall & Ladder Braid Combo | 2-in-1 Hairstyles
Sept 12 2013
You are going to absolutely LOVE this hair tutorial because
you’ll learn two amazing-looking hairstyles using essentially the same
basic techniques!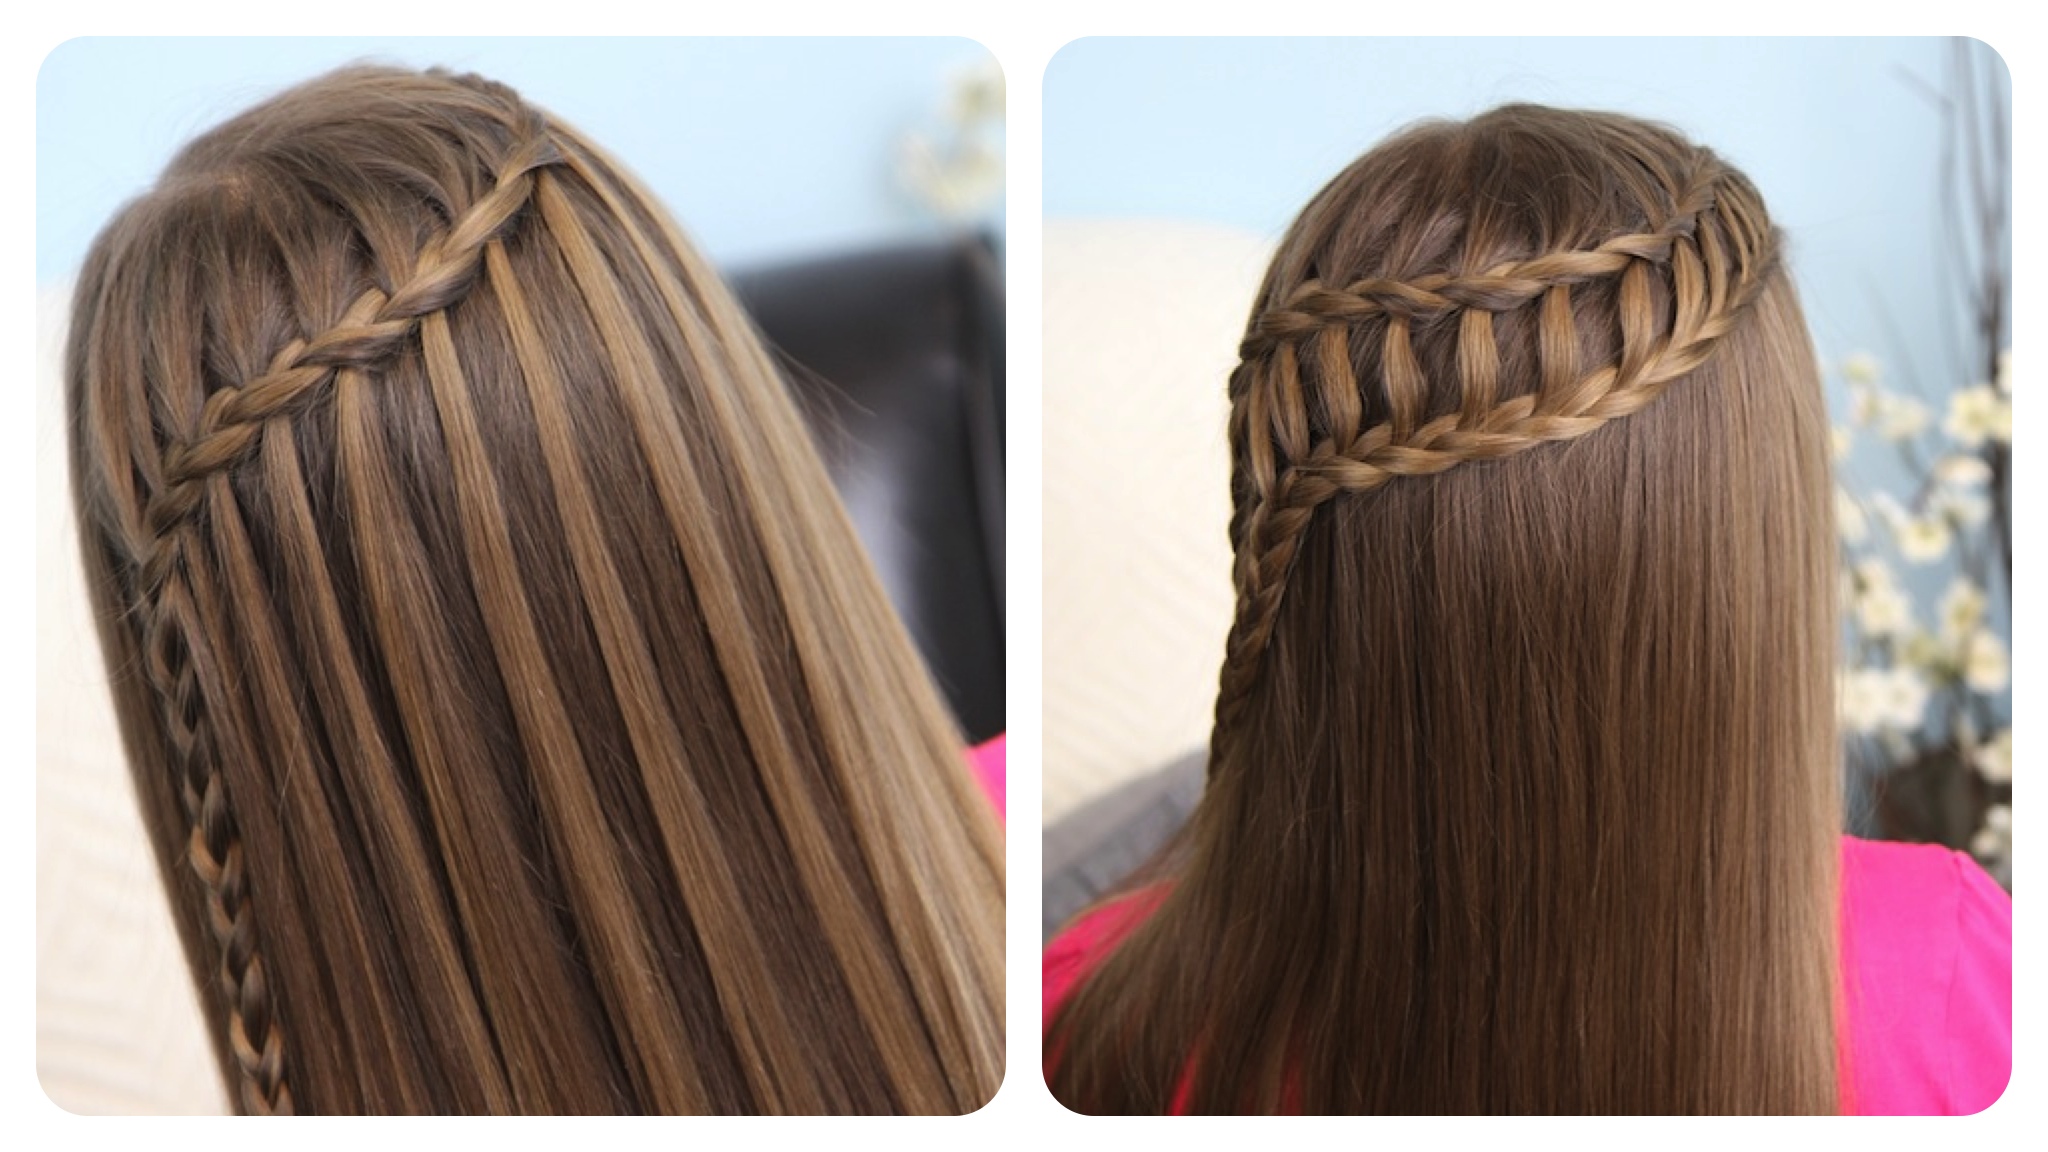
* ~ * ~ * ~ * ~ * ~ * ~ * ~ * ~ * ~ *
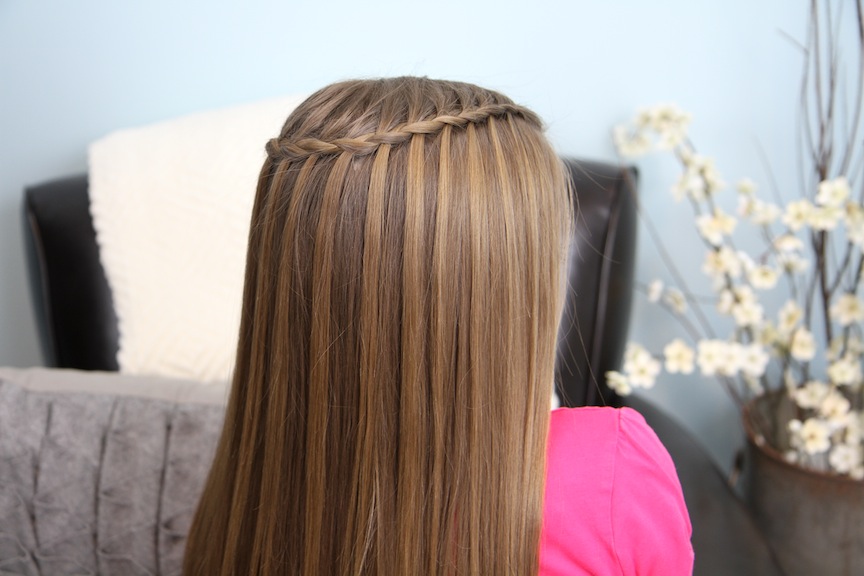
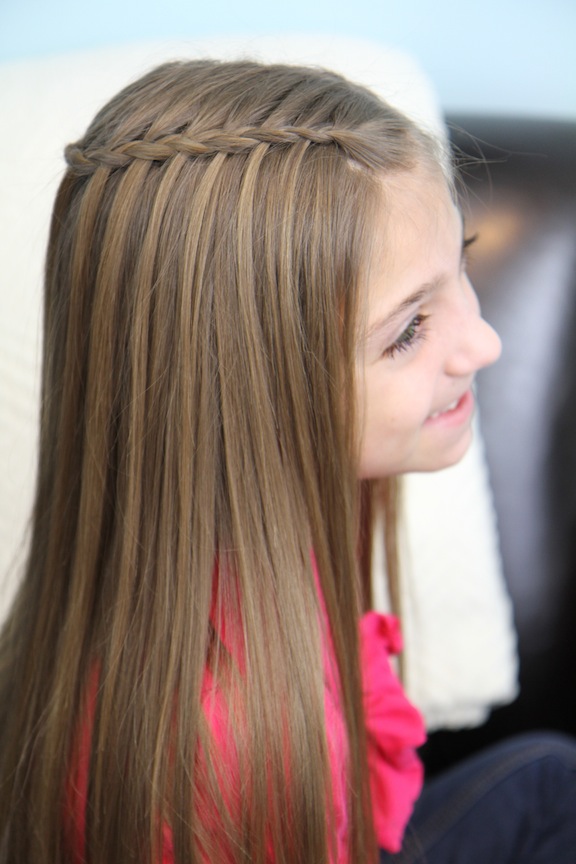
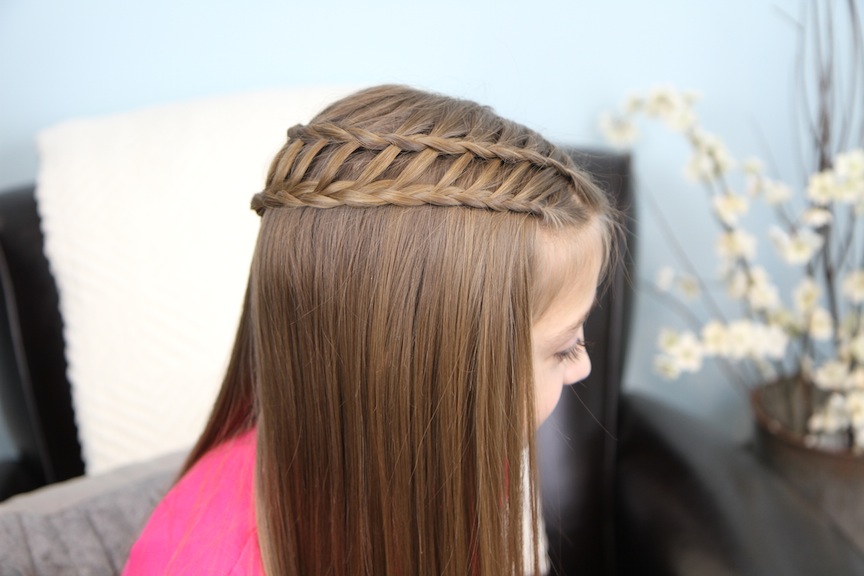
The Feather Waterfall
Items Needed: Brush, rat-tail comb, 1 hair elastic.Time Requirement: 5 minutes
Skill Level: Medium
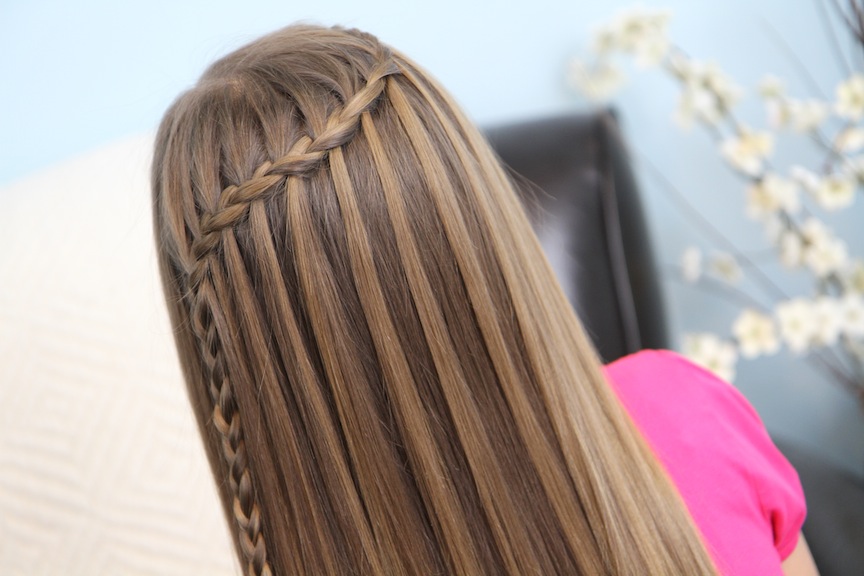
- Pick up a small section of hair near the front of the part line and divide it into three strands…
- Begin a regular braid by creating one stitch…
- Now, add in some hair ONLY to the top strand. {A Lace braid is when you only add hair to one side of the braid, unlike a traditional French/Dutch braid where you would add hair to both sides.}
- Once you’ve added in hair to the top strand, cross that piece over the middle strand…
- Then, pull a tiny section of hair off the bottom strand before crossing this strand over the middle. {This is called a Feather Braid, because the tiny pieces fall off the braid much like a feather with its spine.}
- Continue to add hair to the top strand, removing out tiny sections from the bottom strand, as you work your way around the head…
- When you get near the opposite ear, stop adding in/removing hair, and continue a normal braid down the strands and secure with an elastic.


* ~ * ~ * ~ * ~ * ~ * ~ * ~ * ~ * ~ *
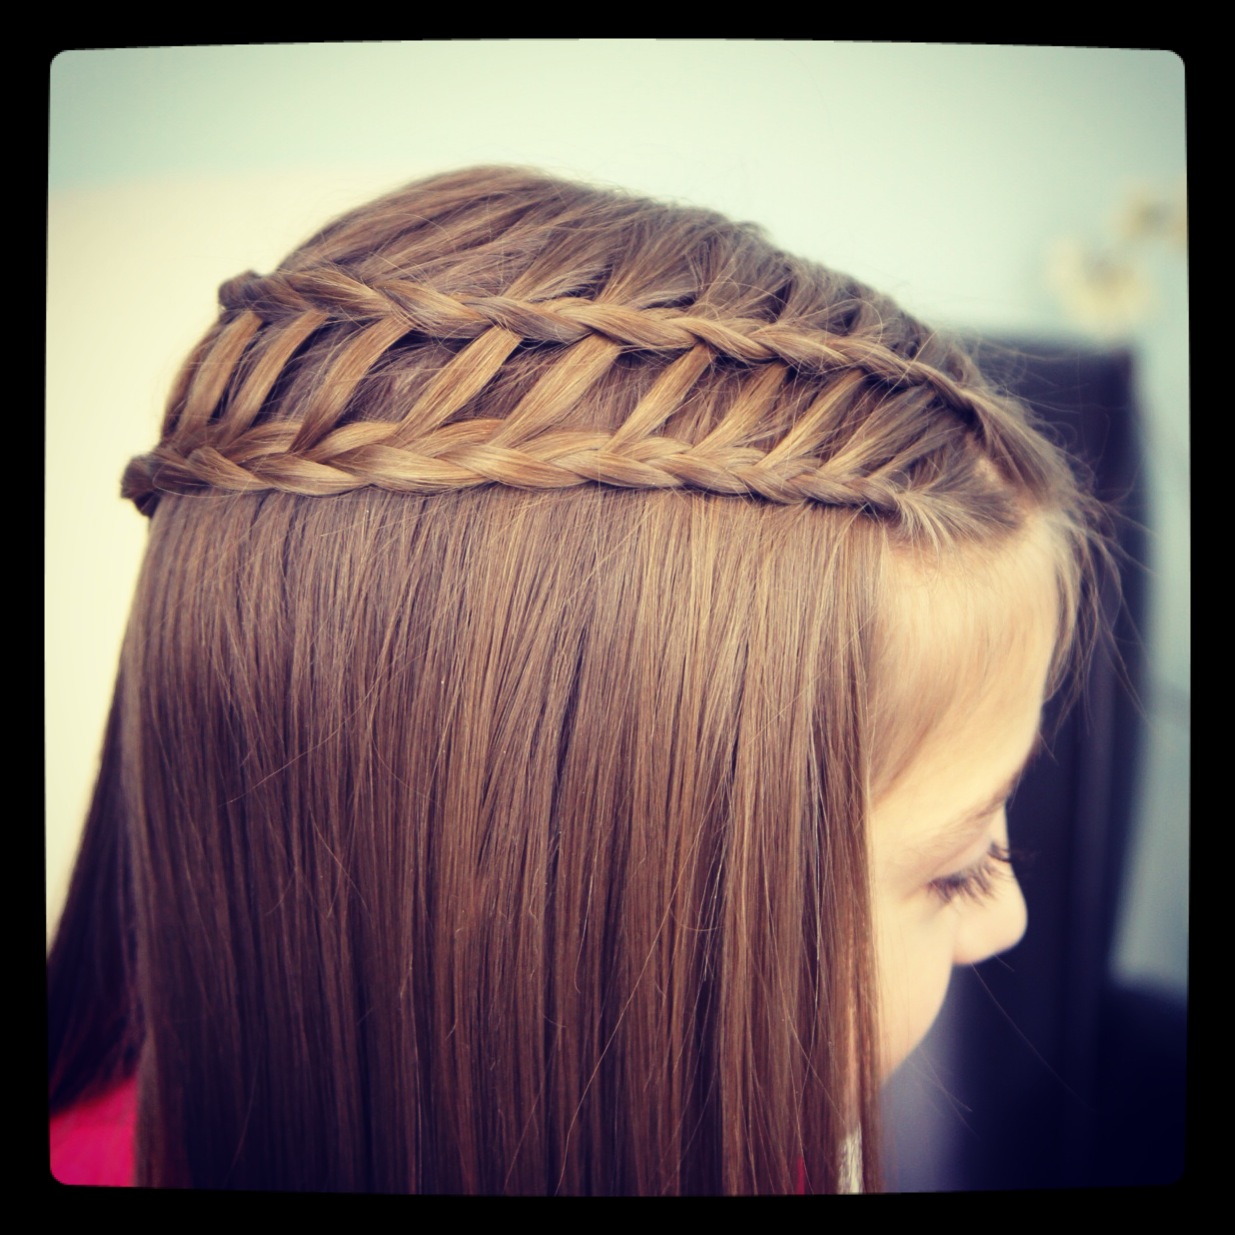
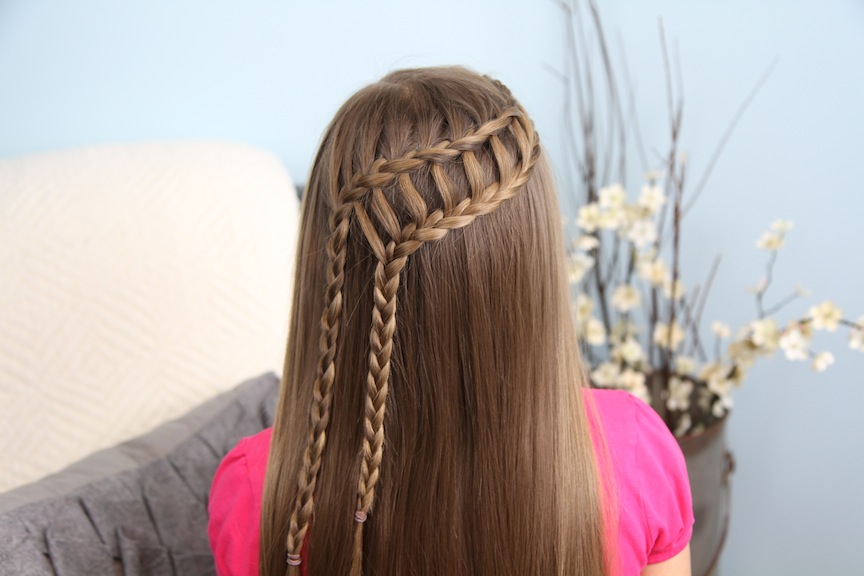
Ladder Braid Combo
Items Needed: Brush, rat-tail comb, 2 hair elastics.Time Requirement: 5-8 minutes.
Skill Level: Medium

- Take the first five feathers, or so, and flip them up and over the head to keep them out of the way while you begin your second braid…
- Pick up another small section of hair, 1-2 inches below the other braid, and begin a regular braid with one stitch…
- Now, add in hair from the top…which essentially creates another Lace Braid. {The difference is that you will only be adding in the “feather” strands from the first braid.}
- Continue braiding, adding in a feather strand into each top strand of the Lace Braid, as you go. This is creating a Ladder Braid, with the feather strands now becoming “rungs” on the ladder…
- As you braid, try to keep the braids about 1-2 inches apart to allow the ladder effect to remain…
- Continue ladder braiding as you work your way around the head.
- When you get near the opposite ear, stop adding in hair and finish off the strand into a normal braid…
- Secure with an elastic.
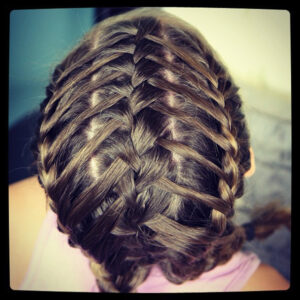
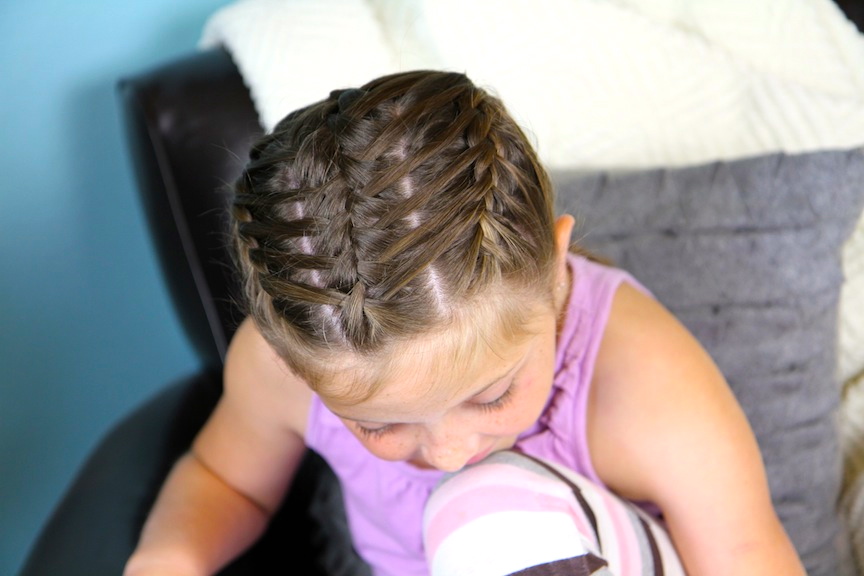
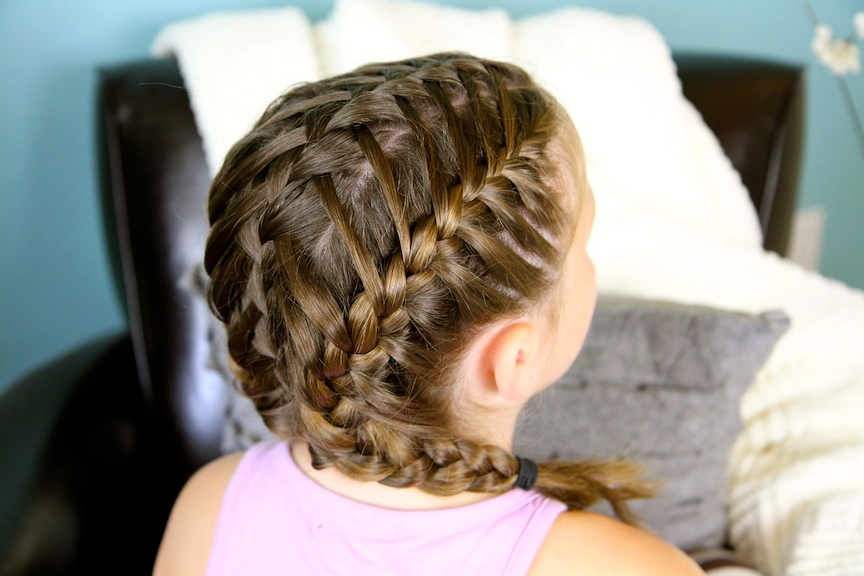
WaterFall into double Frenchbacks!

Time Requirement: 8-10 minutes
Skill Level: Medium
Step-by-Step Instructions:
- Begin by parting the hair into three vertical sections {the two parts should start above the middle of each eyebrow, and run down to the neck. The middle section should be about 3 inches wide}…
- Secure each outside section with an elastic to keep it out of the way…
- Working on the middle section first, begin by creating a regular three-strand French braid. After the first stitch, drop the outside strand of hair.
- Replace that strand, by picking up hair near the part line {this is the same technique used in the Waterfall Braid}….
- When you get to the other side of the braid, drop the outside strand there and replace it with hair with hair near that part line…
- Continue braiding with Steps 4 & 5 all the way down the center braid, dropping each outside piece as you go {continue to replace the outside strands with hair near the part lines}. This will create a double waterfall braid, or a waterfall with strands dropping on both sides of the braid…
- When you run out of hair to add into the braid, finish off this section with a simple three-strand braid, and secure with a hair band {the end of the braid will be smaller because you dropped so much hair off to the sides – this is normal}…
- Now, release the hair on one of the side sections of the head and begin a normal three-strand French braid…
- When you add hair into the top side of this braid, add in only the fallen strands from the Waterfall braid above it…
- When you add in hair from the bottom, do so as you would normally with a French braid…
- Continue this braiding technique, Steps 9 & 10, all the way down until you run out of hair {you will begin to see a ladder effect forming as you pull the strands from the Waterfall braid into the bottom French braid}…
- When you are finished with this side braid, temporarily secure it with a hair band.
- Repeat Steps 8-12 on the opposite side of the head…
- When all three braids are finished, you can complete the hairstyle in many ways. One option would be a ponytail. Anther option would be to form all the ends of the braids into one braid, or you can form the hair into two separate braids over each shoulder as I did in my Soccer Braids tutorial.
- Lastly, add accessories and hairspray as desired.
Feel free to give us feedback
Thankss!!
4 sided fish tail


Items Needed: Brush, rat-tail comb, spray bottle, 1-2 hair band/ponytail holders, 1 small hair elastic, 1 bobby pin, hairspray and accessory {if desired}.
Time Requirement: 8-12 minutes
Skill Level: Medium {only because it is time consuming and your arms get tired!}
Step-by-Step Instructions:
- Begin by brushing the hair and securing it into a high ponytail with a hair band…
- Now, divide the ponytail into two large strands…
- Take a small piece of hair from the outside-left edge of the left strand, cross it over that strand and add it to the inside of the right strand…
- Next, take a small piece of hair from the outside-right edge of the right strand, cross it over the that strand and add it to the inside of the left strand {this completes the first full stitch of a regular fishtail braid}…
- Repeat Steps #3 & 4 to create a second complete stitch of a fishtail braid…
- Now, take a small piece of hair from the outside-left edge of the left strand, cross it under the that strand, and add it to the inside of the right section…
- Take a small piece of hair from the outside-right edge of the right strand, cross it under that strand, and add it to the inside of the left section {you have just created one complete stitch of a reverse fishtail braid}…
- Repeat Steps #6 & 7 to create a second complete stitch of a reverse fishtail braid. {Please make sure that when you add the pieces to the middle, that they stay in the middle. You do not want these pieces migrating to the outside and being used too soon or the fishtail pattern will not look correct.}
- Repeat Steps #3-8 by creating alternating two regular fishtail stitches, and then two reverse fishtail stitches, over and over again until you run out of hair…
- When you reach the end of the braid, secure the hair ends with an elastic.
- You may choose to wrap a small strand of hair around the elastic to hide it, by using a bobby pin.
- {Optional: Gently twist the braid until it wraps around itself to create a very beautiful and intriguing braided bun.}
- Add hairspray and accessories as needed.
Happy Hairdoing!
Wednesday, 11 September 2013
Messy Glow Bun


Time Requirement: 5-10 minutes
Skill Level: Medium
Now, it may look like a bear to take the Glowby out of the Messy Bun, but it really is a 2 second process. Since the strands of the Glowby are smooth plastic fiberoptics, they literally slide right out with a gentle tug on the barrette! No pain!
Hope you enjoy this style, which can be used by girls of all ages on any holiday, or by older girls and women at concerts, dance clubs, etc! Enjoy!
Textured Braid

Time Requirement: 5 minutes
Skill Level: Medium
Step-by-Step Instructions:
- Begin by taking the top section {crown area} of hair and pulling it towards the back of head {make sure to leave about 1 inch of hair above each ear that should not be pulled back}…
- Now, braid this section using a lopsided braid, meaning two regular strands and one small strand.
- When you are done with this braid secure with an elastic and pancake {pull out} the elbows of the braid to add texture and shape to the braid…
- Now, pick up a section of hair on the right side and repeat another lopsided braid . Try to use a section similar in size to the first braid {do not grab the front section over the right ear into this braid}…
- When braid is done, secure ends with an elastic and pancake the edges as you did in Step #3.
- Now take the edges of hair over both ears, and a little hair from the left side of original braid to create a third braid of the left side. You should be pulling the hair over the right ear across the top of the original braid. This just adds a little extra texture and uniqueness to the braids…
- Create the third braid and secure end with an elastic. Pancake the elbows for added emphasis. {Optional: Create the third braid without crossing the hair from the right over both braids}.
Please give us feedback!
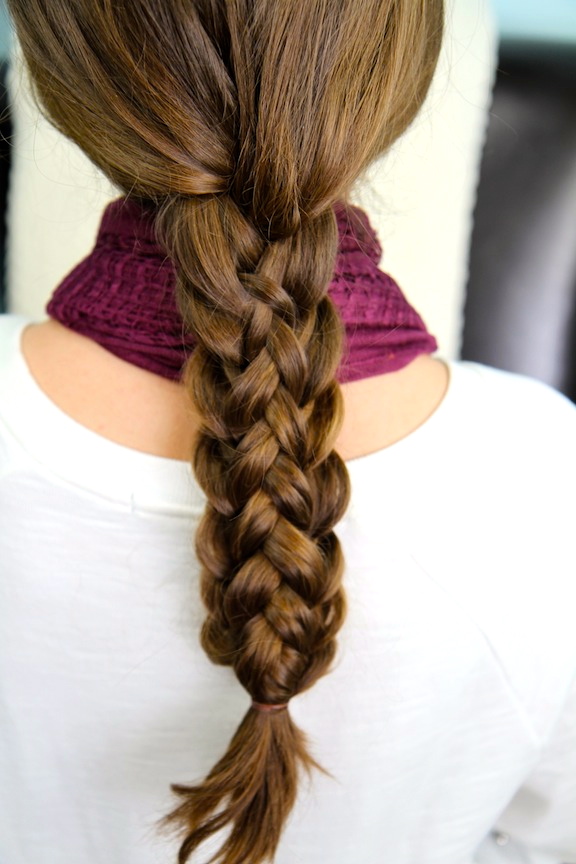
Stacked Braids


Stacked Braids | Cute Braided Hairstyles
Sept 11, 2013
Items Needed: Brush, rat-tail comb, spray bottle, 1 small hair elastic, hairspray {if desired}.
Time Requirement: 5-8 minutes
Skill Level: Medium
Step-by-Step Instructions:
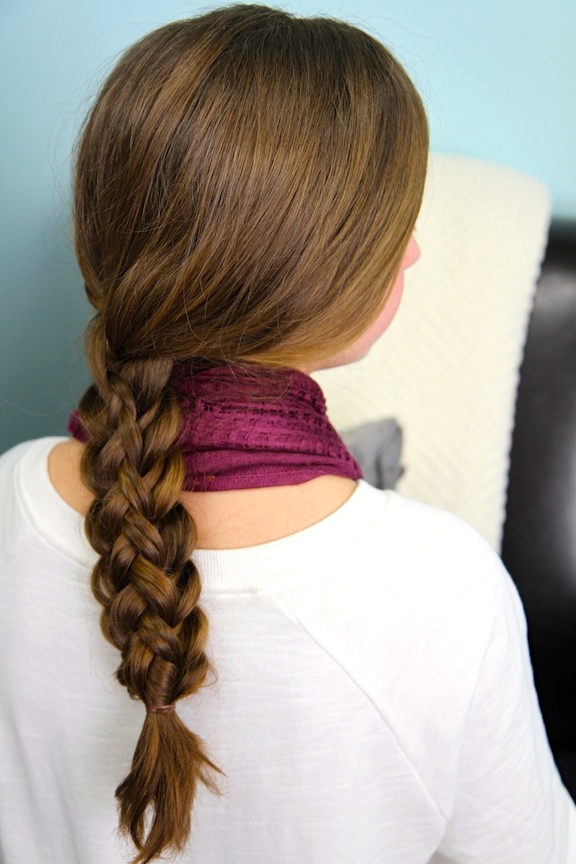
- Begin by brushing the hair and pulling it to wherever you want the braid to lay. {In the video, I did the hair straight down the back, but a side braid would also be very cute.}
- Using all of your hair, section it into three strands and create the first “stitch” of a simple braid…
- After the first stitch, on every outside edge, you will begin creating a Feather Braid… {On the left-most strand of hair, pull out a sliver of hair off the top and lay it to the side. For a DIY, you can use a clip, teeth, or extra hands to hold the strands out of the way.} Also, for this braid, I chose to feather off larger strands at the top and smaller feathers as we worked our way down…
- Now cross that outside strand over the middle to become the middle strand….
- Then, go to the right-most section of hair and pull out a sliver of hair off the top and lay it to the side, and cross the remaining strand over into the middle…
- Repeat these alternating steps until you run out of hair.
- Secure with an elastic. You should have a normal-looking braid with feather strands of hair coming off both sides of the braid all the way down. {Kind of looks like a feather, huh? LOL! That’s why we call it a Feather Braid!}
- Now, pick up the top two feather strands of the left and the top feather strand on the right.
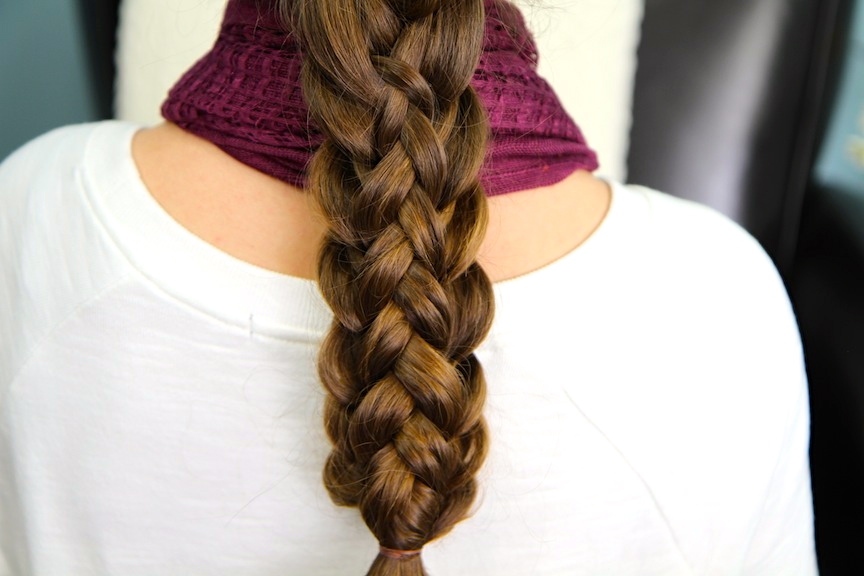
- Begin a Dutch braid using those strands. {When you need to add hair into the braid, use ONLY the other feather strands of hair on both sides of the braid.}
- When you run out of feather strands, finish off with 2-3 stitches of a regular braid….
- Then, undo the original hair elastic and secure both braids together with that same elastic.
- You should now have two braids right on top of each other, the Stacked Braids.
- To help the Dutch braid stand out just a bit more, you may choose to “pancake” the bottom braid edges, as I did, by gently tugging on the elbows to make them a little more puffy. {This helps add to the overall illusion of braid awesomeness!}
Enjoy!
Subscribe to:
Comments (Atom)